
Outpatient Physician Workflow: Patient Search and Consultation Management
1. Purpose of the Scenario
This scenario describes the full workflow of an outpatient physician:
- patient search
- opening the medical record
- working with consultations
- filling in and signing a consultation
2. System Login
Preconditions
- The user is authenticated under an outpatient physician account
Result
Main system workspace is displayed.
3. Patient Search
3.1 Fast Search
Action: Enter patient data in the Fast Search panel:
- Ambulatory card number
- Case number
- Last name / First name / Middle name
- Date of birth (
dd.mm.yyyy) - Document
Expected result: System displays matching patients in the results table.
 📷 Figure 1 — Fast Search panel with available search fields
3.2 Search Results
Action: Review the search results table.
Expected result: A list of patients is displayed with the following columns:
- Time
- Code
- Full name
- Date of birth
- Attachment
- Residential address
- Registration address
- Additional information
- Doctor
 📷 Figure 2 — Patient search results table with highlighted row
3.3 No Results Scenario
Action: Perform a search with no matching patients.
Expected result: System displays message:
Data not found
 Screenshot:
📷 Figure 3 — Empty search result state (Data not found message)
Screenshot:
📷 Figure 3 — Empty search result state (Data not found message)
4. Opening the Medical Record
4.1 Open Patient Record
Action: Double-click a patient row in the search results.
Expected result: Patient medical record opens.
 📷 Figure 4 — Medical record header with patient context
4.2 Medical Record Header
The top section of the medical record displays patient information:
- Patient full name
- Date of birth and age
- Ambulatory case number
- Patient search context (Search patient / from / by)
This section also includes a built-in patient search functionality with filters (similar to Fast Search), allowing quick switching between patients without leaving the medical record.
Additionally, a Reg.cart button is available, which opens the patient’s registration card. This section is described separately.
Expected result: The user can view the current patient context, search for another patient, or open the registration card.
 📷 Figure 5 — Medical record header (patient identification block)
5. Medical Record Structure
Available tabs:
- Consultations
- Radiological Diagnostics
- Laboratory investigations
- Dentistry
- Referrals
- Medical history
- Visits
- Other
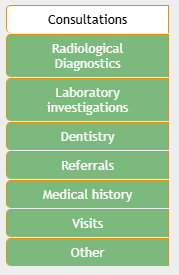
📷 Figure 6 — Medical record tab navigation panel
5.1 Tab Actions
Each tab supports:
- Create
- Create based on
- Edit
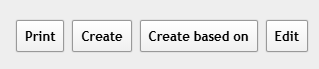
📷 Figure 7 — Tab action toolbar (Print / Create / Edit)
6. Consultations Section
6.1 Consultation List View
Action: Open Consultations tab.
Expected result: List of consultations is displayed.
Displayed fields:
- Consultation number
- Consultation date
- Payment type
- Doctor name
- Specialty
- Service name
- Visit / illness
- ICD-10 diagnosis
- Signed status

📷 Figure 8 — Consultations list with multiple records
6.2 No Previous Versions Rule
System limitation:
- Only the latest version of consultation is stored
6.3 Open Consultation
Action: Double-click a consultation row.
Expected result: Consultation form opens.
Screenshot: 📷 Figure 9 — Consultation form opened (overview layout)
7. Consultation Form
7.1 General Purpose
Used for:
- filling medical data
- ordering services and referrals
- diagnosis creation
- signing consultation
7.2 Action Panel
- Save
- Save the template
- Upload a template
- Sign
- Close
Screenshot: 📷 Figure 10 — Consultation action panel (Save / Sign / Print)
7.3 Saving
Action: Click Save.
Expected result: Consultation is saved as draft.
Screenshot: 📷 Figure 11 — Saved consultation state indicator
7.4 Signing Rules
Action: Click Sign.
System rule: All mandatory fields (highlighted in yellow) must be filled.
Expected result:
- If valid → consultation is signed
- If invalid → signing is blocked
Screenshot: 📷 Figure 12 — Mandatory fields highlighted in yellow + Sign validation
7.5 Editing Rules
- Users with sufficient permissions can edit consultations
- Regular users may have read-only access
Screenshot: 📷 Figure 13 — Read-only vs editable consultation state
7.6 Clinical Sections Overview
Sections include:
- General information
- Clinical data
- Diagnosis
- Conclusion
- Statistical information
Screenshot: 📷 Figure 14 — Consultation form sections overview
7.7 Bottom Panel
Contains:
- system version
- doctor info
- specialty
- Download Manual
- Exit
Screenshot: 📷 Figure 15 — Bottom system panel with Exit button
7.8 Completing Work
Action: Save and/or sign consultation, then exit system.
Expected result: Session is safely closed.
Screenshot: 📷 Figure 16 — Exit button location in consultation form
No comments to display
No comments to display